Testing Deeplinks, Best Practices And Troubleshooting Tips

By Arturo Cuya
Deeplinks are a mission critical part of your application.
The most common use case for deeplinks in a real world application is to play a specific video using the contentId parameter. This usually happens when the app is launched from Roku Search or from clicking an Ad.
Another thing we can do is pass UTM Parameters to track the campaign data that triggered the app launch.
In this post you will learn how to test deeplinks in a Roku application. Stay until the end for a list of tips and tricks to make your developer experience easier, and to know the top three reasons why your tests fail and how to fix them.
The Roku UI Testing Journey
This post is the second of a three-part series about UI testing in Roku.
- UI Testing Fundamentals
- Testing deeplinks, best practices and troubleshooting tips
(You are here)- Launching deeplinks effectively
- Tips and tricks for UI testing in Roku
- The top 3 reasons why your tests are failing (and how to fix them)
Next Post:Case Study: Implementing UI tests in a real world application (Jellyfin for Roku)- Integrating RTA into a BrighterScript Project
- Replacing network responses with custom payloads
- Running tests in parallel using multiple devices
The goal
We will introduce a new label that specifies the video that will be playing first when the app opens.
If the app is opened normally, this label will say "Now playing: RandomVideo".
If the app is opened with a deeplink, the ID of the video from the deeplink will be shown.
We also need to save the campaign data as an object in the global Node — we won’t be doing anything with it for now, but on a real app you’ll probably want to send it on every network request that represents a conversion.
Example: Given a deeplink like this:
myApp://2BPKNZ1MV6JK44CS?utm_campaign=launch2023&utm_source=roku&utm_medium=adOur label should say "Now Playing: 2BPKNZ1MV6JK44CS" and the global node should have the following data in the campaignData field:
{
	utm_campaign: "launch2023",
	utm_medium: "ad",
	utm_source: "roku"
}
Parsing The Deeplink
Let’s refactor our application so that if UTM parameters are found in the contentId parameter we store them in the global Node.
To extract the UTM Parameters from a deeplink, first we need to parse the contentId argument that comes from the main() function argument.
Add the following code to src/source/main.brs
sub main(args) ' <<< add the `args` parameter
	' ...

	m.global = screen.getGlobalNode()

    m.global.addField("deeplink", "string", false)
    m.global.addField("campaignData", "assocarray", false)

    m.global.update(parseContentId(args.contentId))

    screen.CreateScene("MainScene")
    screen.show()

	' ...
end sub

' Get the deeplink and campaign data from a contentId string, where the contentId is an uri
' that starts with `myApp://<deeplink>` and the campaign data comes as
' query parameters for this uri.
function parseContentId(contentId)
    result = {
        deeplink: "",
        campaignData: {}
    }

    if (contentId = invalid)
        return result
    end if

    tokens = contentId.Tokenize("?")

    if (tokens.Count() = 0 or not tokens[0].StartsWith("myApp://"))
        return result
    end if

    result.deeplink = tokens[0]

    if (tokens[1] <> invalid)
        utmParams = ["utm_source", "utm_medium", "utm_campaign", "utm_term", "utm_content"]

        uriParams = tokens[1].Tokenize("&")
        for each param in uriParams
            keyValue = param.Tokenize("=")
            if (keyValue.Count() <> 2)
                continue for
            end if

            for each utmParam in utmParams
                if (keyValue[0] = utmParam)
                    result.campaignData[utmParam] = keyValue[1]
                end if
            end for
        end for
    end if

    return result
end function
Our new method parseContentId extracts the deeplink and the campaign data into an object like this:
' source: `myApp://2BPKNZ1MV6JK44CS?utm_campaign=launch2023&utm_source=roku&utm_medium=ad`
{
	deeplink: "myApp://2BPKNZ1MV6JK44CS",
	campaignData: {
		utm_campaign: "launch2023",
		utm_medium: "ad",
		utm_source: "roku"
	}
}
The update() method updates the Node field values from an object, as long as the fields in the object already exist in the Node.
Showing The Video ID
Now let’s add a label that implements our previous requirement:
If the app is opened normally, this label will say
"Now playing: RandomVideo". If the app is opened with a deeplink, the ID of the video from the deeplink will be shown.
Let’s add some code to src/components/MainScene.brs to achieve this:
sub init()
	' ...

    nowPlayingLabel = m.top.CreateChild("Label")
    nowPlayingLabel.update({
        id: "nowPlaying",
        translation: [200, 100]
    })

    if (m.global.deeplink <> "")
        prefix = "myApp://"
        nowPlayingLabel.text = "Now Playing: " + m.global.deeplink.Mid(prefix.Len())
    else
        nowPlayingLabel.text = "Now Playing: RandomVideo"
    end if

    m.top.signalBeacon("AppLaunchComplete")

	' ...
end sub
Testing Our Implementation
For consistency, we can add the following validation to our initial test to check the default behavior for the nowPlaying label:
// Get the text from the Label with id "nowPlaying"
labelKeyPath = '#nowPlaying.text';
textResponse = await odc.getValue({
	keyPath: labelKeyPath
});

// Make sure the key path result is found
expect(textResponse.found, `KeyPath ${labelKeyPath} not found`).to.be.true;

// Text value assertion
expect(textResponse.value).to.eql("Now Playing: RandomVideo");
The actual test for the deeplink is also straightforward:
it('shows video id and saves campaign data when opening app with deeplink', async () => {
    // Launch the app with the deeplink
    await ecp.sendLaunchChannel({
        params: {
            contentId: 'myApp://2BPKNZ1MV6JK44CS?utm_campaign=launch2023&utm_source=roku&utm_medium=ad'
        }
    })

    // Wait for application load
    await odc.onFieldChangeOnce({
        keyPath: '.appLaunchFinished',
        match: true
    })

    // Get the text from the Label with id "nowPlaying"
    const labelKeyPath = '#nowPlaying.text';
    const textResponse = await odc.getValue({
        keyPath: labelKeyPath
    });

    // Make sure the key path result is found
    expect(textResponse.found, `KeyPath ${labelKeyPath} not found`).to.be.true;

    // Text value assertion
    expect(textResponse.value).to.eql("Now Playing: 2BPKNZ1MV6JK44CS");

    // Get the campaign data from m.global
    const campaignResponse = await odc.getValue({ base: 'global', keyPath: '.campaignData' });

    expect(campaignResponse.value).to.eql({
        utm_campaign: "launch2023",
        utm_medium: "ad",
        utm_source: "roku"
    })

    // End the in-app task that allows to get values from keypaths.
    await odc.shutdown();
});
Congratulations! Now you know how to test deeplinks.
Remember to be very redundant and test all kinds of deeplink-based behaviors for your app.
Since deeplinks can come from Ads, guaranteeing their quality is a top priority for getting the full bang for your buck.
Tips and Tricks
Now let me give you some tips and tricks to better use these methods:
Find Key Paths Easily
In a complex real world application, getting the keypath of a Node can be very complicated, especially if the Node we’re looking for is the child of a *List or *Grid parent.
Fortunately, the VSCode Plugin for BrighterScript has an integration called Scenegraph Inspector under the Run & Debug panel.
Follow these steps to get the keypath of a node:
- Click on the
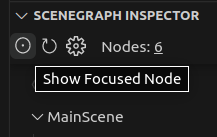
Run & Debugpanel and unfold theSceneGraph Inspectorview. - You have a couple of options to find the Node you’re looking for:
- Manually focus the Node with your remote control and press the
Show Focused Nodebutton.
- Use the feature
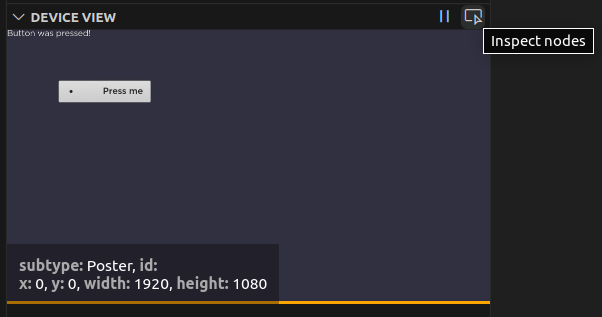
Inspect nodesfrom theDevice view(also in theRun & Debug) panel to manually click on the component you’re interested on. Make sure to do this while theSceneGraph Inspectorview is unfolded.
- Manually focus the Node with your remote control and press the
- Click on the option
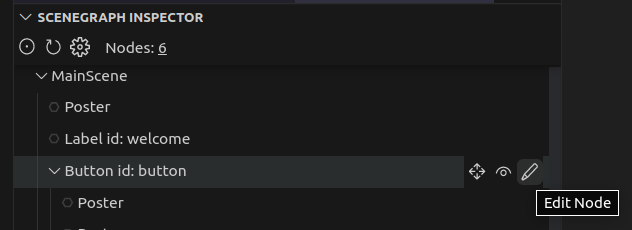
Edit Nodeof the Node you’re interested on.
- Click on the key icon called
Show Key Path Infoto show the Node’s keypath.
Remember, the m scope is private
By the way, key paths can only help you access information from the m.top scope of the component.
Any variables that are in the m scope are private for the component.
You could create public getter functions, but I don’t recommend it since it derails from the idea of UI testing, which is test from what the user is seeing and doing.
Better Key Presses
Many key presses can give unexpected results if your application takes too long to process them.
Let’s say you have a GridList and, after focusing it, you want to go down three rows. You would try something like this:
// Press down 3 times
await ecp.sendKeyPress(ecp.Key.Down);
await ecp.sendKeyPress(ecp.Key.Down);
await ecp.sendKeyPress(ecp.Key.Down);
Or maybe even have a for loop to press down n times.
The problem with this is that if your application has to render a lengthy row every time you press down, some of your subsequent key presses might not be processed correctly.
To avoid this, consider always setting a delay of at least 50 milliseconds before each new key press.
Fortunately, the method ecp.sendKeyPress accepts a second parameter to do exactly this.
// Now we wait 250ms before each key press
await ecp.sendKeyPress(ecp.Key.Down, 50)
await ecp.sendKeyPress(ecp.Key.Down, 50)
await ecp.sendKeyPress(ecp.Key.Down, 50)
Even better, you can add this 50ms delay to the rta-config.json file, so that ecp.sendKeyPress() considers it as the default value.
{
	"ECP": {
		"default": {
			"keypressDelay": 50
		}
	}
}
What To Do When Things Fail?
Reason #1: Your app crashed
The Javascript process that runs your test cannot detect if your application crashes. When a test times out, you will need to check your application logs to rule out a crash.
Fortunately, RTA shows the Telnet logs by default if a command times out.
Although, you might want to check your logs on a different console view. In that case, to avoid cluttering your test results, you can add this configuration to your ui-tests/rta-config.json file:
{
	"disableTelnet": true
}
Reason #2: Key Path Not Found
If you make a mistake setting the key path you’re looking for, you won’t notice your mistake until you assert the extracted (undefined) value later.
        let textResponse = await odc.getValue({
            keyPath: '#welcozme.text' // TYPO!!!!!
        });

        // Text value assertion
        expect(textResponse.value).to.eql("Hello from create-roku-app");
Result:
  0 passing (6s)
  1 failing

  1) hello world
       says hello world:
     AssertionError: expected undefined to deeply equal 'Hello from create-roku-app'
Notice that we extract the value field from the result of odc.getValue() instead of using the result directly.
This is because the function actually returns a complex object. Let’s see the result object when we look for the keypath without the typo.
{
  found: true,
  id: 'n2W8ltS',
  success: true,
  timeTaken: 1,
  value: 'Hello from create-roku-app'
}
This is the result with the typo:
{
	found: false,
	id: 'gQUYke6',
	success: true,
	timeTaken: 0
}
We could add an additional assertion to check that found is true, checking the actual test value.
// Get text from Label with id "welcome"
let labelKeyPath = '#welcome.text';
let textResponse = await odc.getValue({
	keyPath: labelKeyPath
});

// Make sure the key path result is found
expect(textResponse.found, `KeyPath ${labelKeyPath} not found`).to.be.true;

// Text value assertion
expect(textResponse.value).to.eql("Hello from create-roku-app");
In the case we introduce a typo, the error displayed would be much more specific:
  1) hello world
       says hello world:

      KeyPath #welcozme.text not found
      + expected - actual

      -false
      +true
Reason #3: Unexpected behavior
There’s also the case where an unexpected event happens that disrupts the flow you’re testing.
For example, some applications show an error dialog when a network request fails.
A real user would dismiss the error message and try to access the content again, but our test does not have that kind of flexibility.
Our test would usually fail on an observer check, since any key presses sent while this unexpected message is shown would have a completely different meaning.
These problems are hard to debug, especially when things magically work by just running the test again.
When everything else fails, make sure to take a screenshot of the application so that you can inspect what happened later — especially if you plan to relax or do something else while your test runs.
To achieve this, we can use the afterEach() method from Mocha to perform an action when our test fails.
Do not define the
afterEach()function as an arrow function (() => {}), otherwise thethisobject won’t be available in the function scope.
describe('hello world', () => {
    afterEach(async function () {
        if (this.currentTest.state !== 'failed') {
            // ok
            return
        }

        // Handle failure
        console.log('Test failed. Getting screenshot...');

        let filePath = './ui-tests/artifacts/failed/';
        if (this.currentTest.parent !== undefined) {
            filePath += `[${this.currentTest.parent.title}]@[${this.currentTest.title}]`;
        } else {
            filePath += this.currentTest.title
        }

        const result = await device.getScreenshot(filePath);
        console.log(`Screenshot saved in ${result.path}`);

        // End the in-app task that allows to get values from keypaths.
        await odc.shutdown();
    });

    it('says hello world', async () => {
		// ...
	});
});
Continue Your Roku UI Testing Journey
This post is the second of a three-part series about UI testing in Roku.
- UI Testing Fundamentals
- Testing deeplinks, best practices and troubleshooting tips
(You are here)- Launching deeplinks effectively
- Tips and tricks for UI testing in Roku
- The top 3 reasons why your tests are failing (and how to fix them)
Next Post:Case Study: Implementing UI tests in a real world application (Jellyfin for Roku)- Integrating RTA into a BrighterScript Project
- Replacing network responses with custom payloads
- Running tests in parallel using multiple devices
Subscribe to get notified when the next post comes out!
Some other ways I can help you:
1. Course: A Modern Introduction to Roku Development
For absolute beginners, this course is meant to set you in the right path to make use of modern tools and best practices from day one. Learn more.
2. Open Source tools to boost your productivity:
Use these tools to 10x your workflows. Free and open source forever.
- create-roku-app: A CLI tool to quickly scaffold Roku apps using the best practices.
- SceneGraph Flex: A flexbox component for Roku Scenegraph applications.
- Roku Animate: Define complex Roku Scenegraph animations in one line of code.
